FRP内网穿透 WIN10 CENTOS6 开机启动
因为家里有台蜗牛星际安装了WIN10作为下载机同时用hyper-v 和 docker 跑了一些服务,不在家的时候用vnc远程连接操作或者用vsc的远程开发连到hyper-v上的Centos6.5
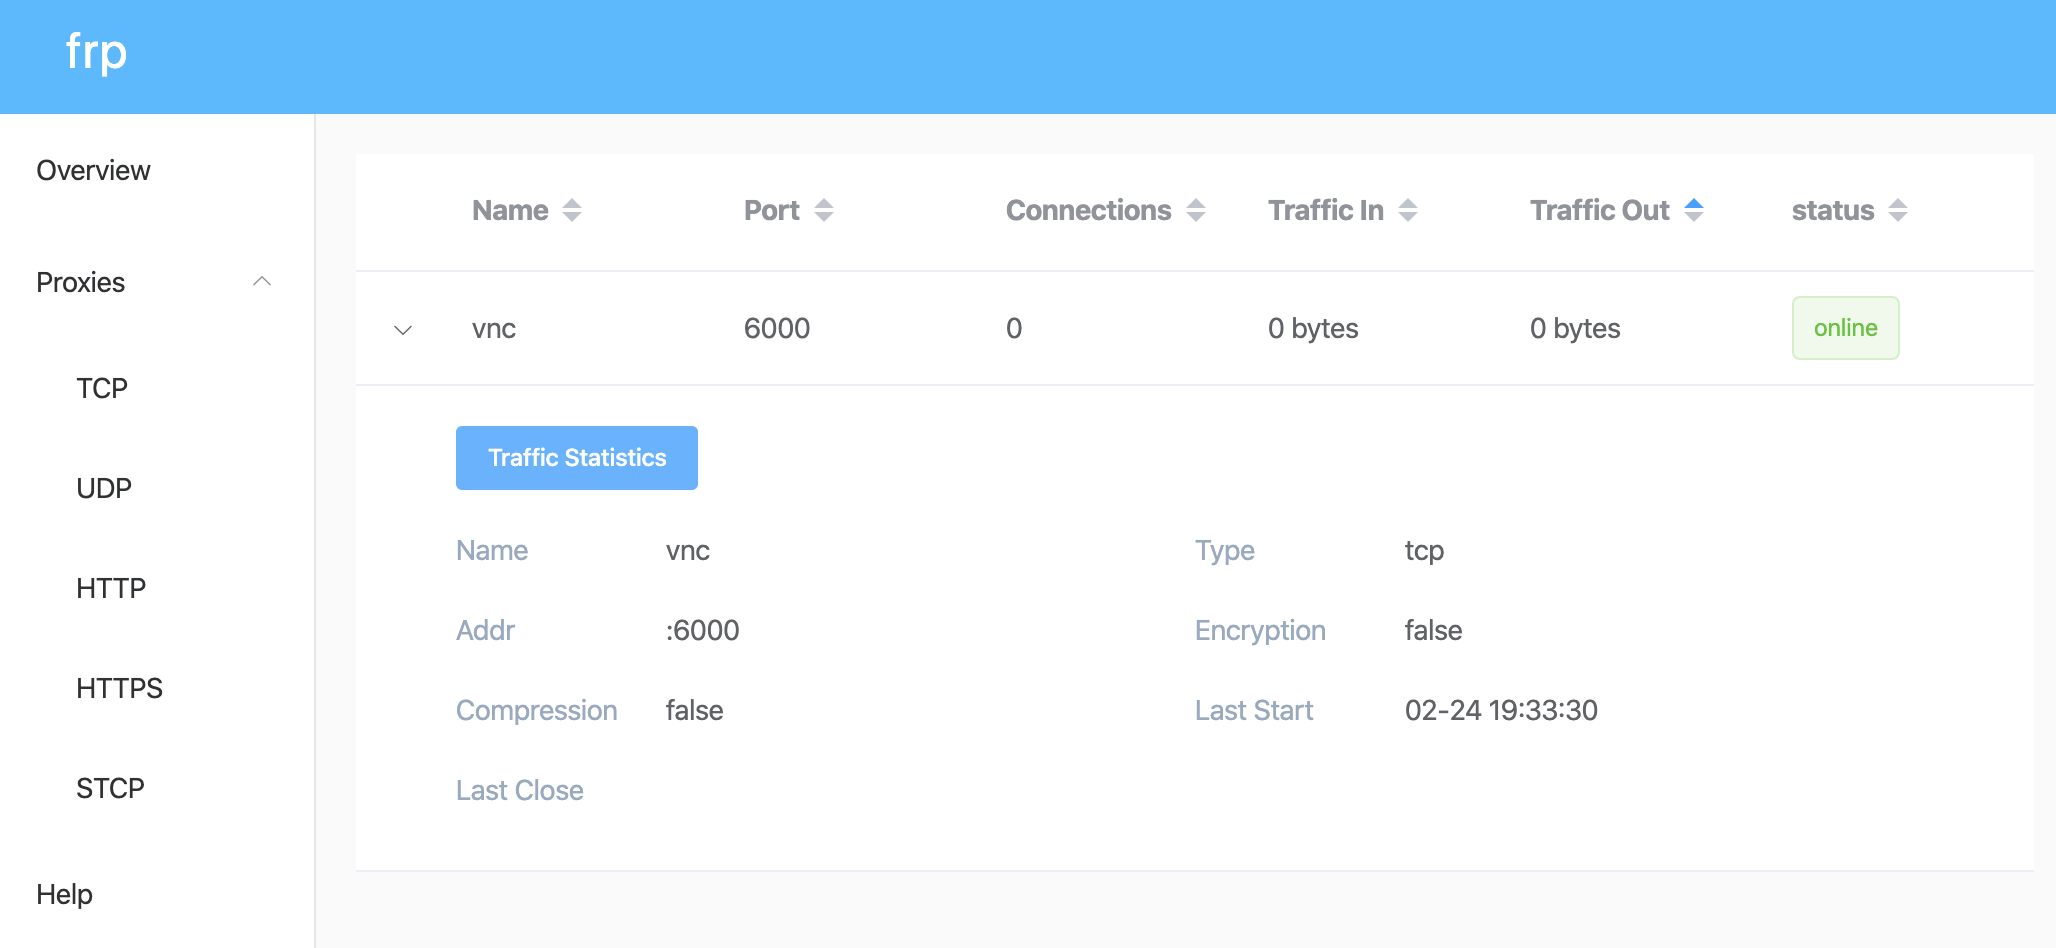
下面介绍一下穿透内网vnc远程桌面内网机器的过程
家里用的是移动宽带,没有外网IP
不在家的话只好用内网穿透
不过前提条件是需要有一台有固定IP的VPS
内网是:WIN10 (客户端)
外网中转VPS (服务器端)
操作系统:CENTOS6.5
固定IP:123.123.123.123
我用的是
https://github.com/fatedier/frp
下载对应的文件,分别是
WIN10用 frp_0.31.2_windows_amd64.zip
CENTOS6.5用 frp_0.31.2_linux_arm64.tar.gz
服务器端
文件放在这里 /data/services/frp/
修改配置文件 frps.ini
[common]
bind_addr = 0.0.0.0
bind_port = 7100
# 设置管理后台的用户名和密码
dashboard_user = king
dashboard_pwd = king
dashboard_port = 7700
后执行测试一下
# frps -c frps.ini
通过浏览器访问
http://123.123.123.123:7700
这里要注意vps要配置一下防火墙放开 7100和7700两个端口
centos 就是
# vi /etc/sysconfig/iptables
添加
-A INPUT -m state --state NEW -m tcp -p tcp --dport 7100 -j ACCEPT
-A INPUT -m state --state NEW -m tcp -p tcp --dport 7700 -j ACCEPT
保存后重启防火墙
# service iptables restart
当然你的VPS是在腾讯云这些云平台的话还要注意一下安全组的设置
客户端
下载的文件放在 c:/frp
修改frpc.ini
[common]
server_addr = 123.123.123.123 #这里要和上面配置的服务器端口一致
server_port = 7100

[vnc] #名称自定义
type = tcp #vnc走的是tcp
local_ip = 127.0.0.1 #本地IP
local_port = 5900 #vnc默认的端口
remote_port = 6000 #转发端口
然后执行
frpc.exe -c frpc.ini
然后手机断开WIFI在4G下用VNC连接 123.123.123.123:6000 测试一下
WIN10开机启动 frpc
用这个工具 https://github.com/kohsuke/winsw
下载对应平台的执行文件,我这里是
WinSW.NET461.exe
把执行文件改名为 winsw.exe 放到 c:/frp
添加新增一个配置文件 winsw.xml 放到 c:/frp
<service>
    <id>frp</id>
    <name>frp</name>
    <description>frp remote control</description>
    <executable>frpc</executable>
    <arguments>-c frpc.ini</arguments>
    <logmode>reset</logmode>
</service>
然后以管理员的身份cmd,执行如下命令
winsw install
winsw start
搞定!
CENTOS6.5开机启动 frps
添加文件 /data/services/frp/frps.sh
nohup /data/services/frp/frps -c /data/services/frp/frps.ini >> /data/services/frp/frps.log 2>&1 &
添加文件 /etc/init.d/frps
#!/bin/bash
#
# Comments to support chkconfig
# chkconfig: - 98 02
# description: your_prog_name service script
#
# Source function library.
. /etc/init.d/functions

### Default variables
prog_name="frps"
prog_path="/data/services/frp/frps.sh"
pidfile="/var/run/${prog_name}.pid"
prog_demon="frps"
options=""

# Check if requirements are met
[ -x "${prog_path}" ] || exit 1

RETVAL=0

start(){
  echo -n $"Starting $prog_name: "
  daemon $prog_path $options
  RETVAL=$?
  PID=$(pidof ${prog_demon})
  [ ! -z "${PID}" ] && echo ${PID} > ${pidfile}
  echo
  [ $RETVAL -eq 0 ] && touch /var/lock/subsys/$prog_name
  return $RETVAL
}

stop(){
  echo -n $"Shutting down $prog_name: "
  killproc -p ${pidfile}
  RETVAL=$?
  echo
  [ $RETVAL -eq 0 ] && rm -f /var/lock/subsys/$prog_name
  return $RETVAL
}

restart() {
  stop
  start
}

case "$1" in
  start)
    start
    ;;
  stop)
    stop
    ;;
  restart)
    restart
    ;;
  status)
    status $prog_demon
    RETVAL=$?
    ;;
  *)
    echo $"Usage: $0 {start|stop|restart|status}"
    RETVAL=1
esac

exit $RETVAL
执行以下命令
# chkconfig frps on 设置开机运行
# service frps start 启动
# service frps status 查看状态
# service frps stop 关闭