分类 技术 下的文章

最近练听力,找到 englishpod 的 mp3,非常不错,但是缺少同步字幕,所以用openai的whisper来转换
但是官方的 whisper 每次只处理30s,需要分片处理,所以找到了 Whisper Jax 声称速度更快,而且不需要自己处理分片的问题。

import jax
import jax.numpy as jnp
import os
import time
import json
import magic
from whisper_jax import FlaxWhisperPipline

def get_mp3_files(directory):
    total_files = 0
    print(f"scanning files...")
    for root, dirs, files in os.walk(directory):
        for file in files:
            mime = magic.Magic(mime=True)
            if mime.from_file(os.path.join(root, file)) == 'audio/mpeg':
                total_files += 1
                yield os.path.join(root, file)
    print(f"Total files: {total_files}")

def mp3_to_text(directory):
    pipeline = FlaxWhisperPipline("openai/whisper-large-v2", dtype=jnp.bfloat16)
    for mp3_file in get_mp3_files(directory):
        print(f"Processing file: {mp3_file}")

        txt_file = os.path.splitext(mp3_file)[0] + '.txt'
        if os.path.isfile(txt_file):
            print(f"Skipping file: {mp3_file}")
            continue

        start_time = time.time()
        text = pipeline(mp3_file, task="translate", language="chinese",return_timestamps=True)
        text_length = len(text['text'])  # 获取转录文本的长度
        print(f"Text length: {text_length} characters")
        end_time = time.time()
        print(f"Processed in {end_time - start_time} seconds")

        with open(txt_file, 'w') as f:
            f.write(json.dumps(text))


start_time = time.time()
mp3_to_text('/data/englishpod')
end_time = time.time()
print(f"Total time: {end_time - start_time} seconds")
使用这个工具
https://github.com/vzhd1701/evernote-backup

备份步骤1
如果是印象笔记要注意的是需要加入 --backend china 参数

./evernote-backup.exe init-db --backend china
Logging in to Evernote...
Username or Email: king@gmail.com
Password:
Enter one-time code (+XX XXX XXXX 2010): 638303
Authorizing auth token, china backend...
Successfully authenticated as king!
Current login will expire at 2024-07-09 07:31:21.
Initializing database en_backup.db...
Reading database en_backup.db...
Successfully initialized database for king!

备份步骤2

./evernote-backup.exe sync
Reading database en_backup.db...
Authorizing auth token, china backend...
Successfully authenticated as king!
Current login will expire at 2024-07-09 07:31:21.
Syncing user notebooks...
  [####################################]  60931/60931
2267 note(s) to download...
Downloading 2267 note(s)...
  [####################################]  2267/2267
Updated or added notebooks: 96
Updated or added notes: 2267
Expunged notebooks: 38
Expunged linked notebooks: 0
Expunged notes: 660
Synchronization completed!

备份步骤3

./evernote-backup.exe export ./
Reading database en_backup.db...
Exporting notes...
  [####################################]  96/96
All notes have been exported!

Swoole4.5.7 + hyperf

用阿里云上传文件的时候莫名奇妙的异常
Oss\Core\OssException: : RequestId:

找了好久才定位到是SWOOLE_HOOK_CURL导致的问题,于是
检查 bin/hyperf.php
! defined('SWOOLE_HOOK_FLAGS') && define('SWOOLE_HOOK_FLAGS', SWOOLE_HOOK_ALL);
配置是对的,根据Swoole官方文档 SWOOLE_HOOK_ALL:打开所有类型但不包括CURL
https://wiki.swoole.com/wiki/diff/?id=993&version=0&compare=current

然后发现一个好心人做了一个兼容组件
https://github.com/Reasno/swoole-aliyunoss-addon

安装后再把SWOOLE_HOOK_CURL打开
! defined('SWOOLE_HOOK_FLAGS') && define('SWOOLE_HOOK_FLAGS', SWOOLE_HOOK_ALL | SWOOLE_HOOK_CURL)

错误却变成了
string(106) "MissingContentLength: You must provide the Content-Length HTTP header. RequestId: 5FC048380D92D938376A214A"
这种情况不用定位了,还是换个Swoole版本看看效果,先删除swoole-aliyunoss-addon

composer remove swoole-aliyunoss-addon

然后把Swoole升级到4.5.8问题依旧
最后把Swoole降级到4.5.2问题解决

看了官方文档
https://wiki.swoole.com/#/runtime?id=swoole_hook_all
从 v4.5.4 版本起,SWOOLE_HOOK_ALL 包括 SWOOLE_HOOK_CURL
原来是这样....

如果版本高于4.5.4使用下面这个就可以解决问题了
! defined('SWOOLE_HOOK_FLAGS') && define('SWOOLE_HOOK_FLAGS', SWOOLE_HOOK_ALL ^ SWOOLE_HOOK_CURL)

还有一个解决方案就是使用支持hook curl的php oss sdk
https://packagist.org/packages/starfalling/aliyun-oss-php-sdk

旁路由部署好后,问题来了,设备要手动设置网关地址,很不方便
例如我的主路由IP是192.168.1.1
旁路由是192.168.1.10
因为DHCP服务器在主路由上,所以获取到的网关都是主路由IP
这时候可以通过 dnsmasq 解决这个问题
在主路由OPENWRT里面编辑
vim /etc/dnsmasq.conf
在最后面添加
dhcp-option=3,192.168.1.10
dhcp-option=6,192.168.1.10
这样主路由的DHCP在分配IP的时候会把网站和DNS分配为192.168.1.10

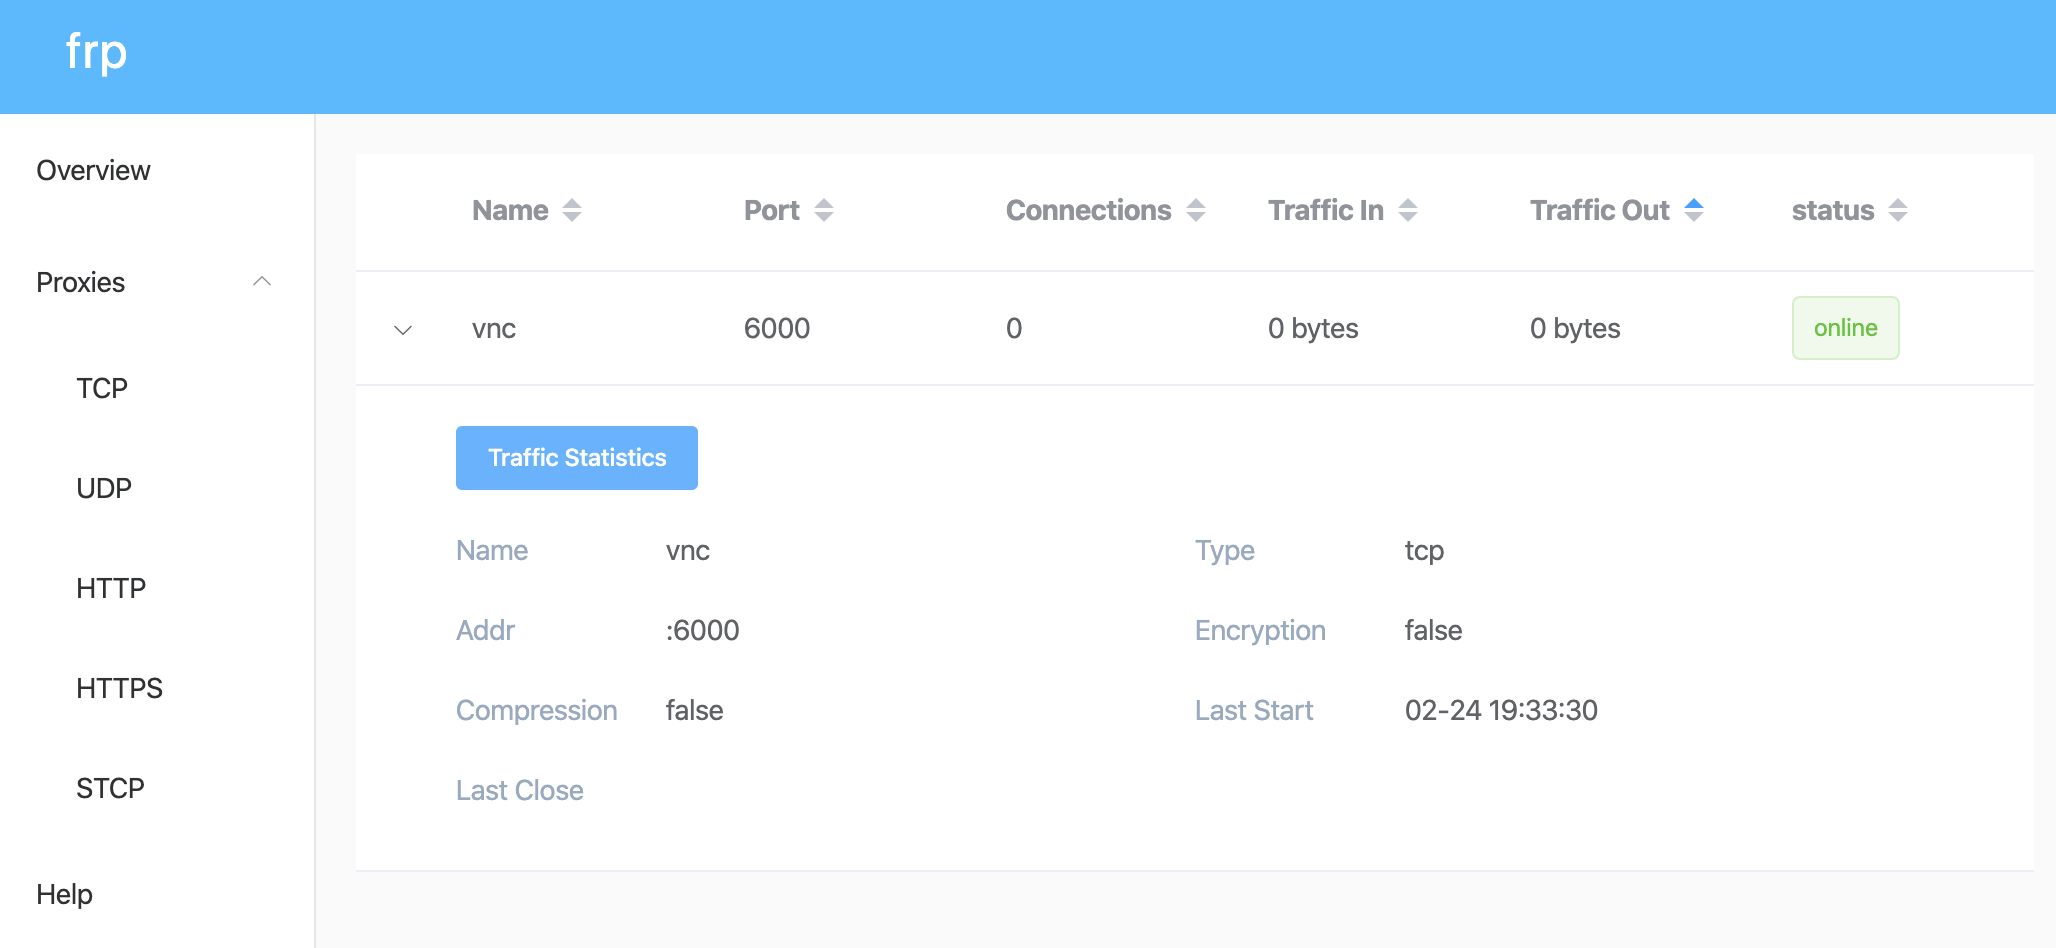
frp管理端截图

因为家里有台蜗牛星际安装了WIN10作为下载机同时用hyper-v 和 docker 跑了一些服务,不在家的时候用vnc远程连接操作或者用vsc的远程开发连到hyper-v上的Centos6.5
下面介绍一下穿透内网vnc远程桌面内网机器的过程

家里用的是移动宽带,没有外网IP
不在家的话只好用内网穿透

不过前提条件是需要有一台有固定IP的VPS

内网是:WIN10 (客户端)
外网中转VPS (服务器端)
操作系统:CENTOS6.5
固定IP:123.123.123.123

我用的是
https://github.com/fatedier/frp
下载对应的文件,分别是
WIN10用 frp_0.31.2_windows_amd64.zip
CENTOS6.5用 frp_0.31.2_linux_arm64.tar.gz

服务器端

文件放在这里 /data/services/frp/
修改配置文件 frps.ini

[common]
bind_addr = 0.0.0.0
bind_port = 7100
# 设置管理后台的用户名和密码
dashboard_user = king
dashboard_pwd = king
dashboard_port = 7700

后执行测试一下
# frps -c frps.ini
通过浏览器访问
http://123.123.123.123:7700
这里要注意vps要配置一下防火墙放开 7100和7700两个端口
centos 就是
# vi /etc/sysconfig/iptables
添加
-A INPUT -m state --state NEW -m tcp -p tcp --dport 7100 -j ACCEPT
-A INPUT -m state --state NEW -m tcp -p tcp --dport 7700 -j ACCEPT
保存后重启防火墙
# service iptables restart
当然你的VPS是在腾讯云这些云平台的话还要注意一下安全组的设置

客户端

下载的文件放在 c:/frp
修改frpc.ini

[common]
server_addr = 123.123.123.123 #这里要和上面配置的服务器端口一致
server_port = 7100

[vnc] #名称自定义
type = tcp #vnc走的是tcp
local_ip = 127.0.0.1 #本地IP
local_port = 5900 #vnc默认的端口
remote_port = 6000 #转发端口

然后执行
frpc.exe -c frpc.ini

然后手机断开WIFI在4G下用VNC连接 123.123.123.123:6000 测试一下

WIN10开机启动 frpc

用这个工具 https://github.com/kohsuke/winsw
下载对应平台的执行文件,我这里是
WinSW.NET461.exe
把执行文件改名为 winsw.exe 放到 c:/frp
添加新增一个配置文件 winsw.xml 放到 c:/frp

<service>
    <id>frp</id>
    <name>frp</name>
    <description>frp remote control</description>
    <executable>frpc</executable>
    <arguments>-c frpc.ini</arguments>
    <logmode>reset</logmode>
</service>

然后以管理员的身份cmd,执行如下命令
winsw install
winsw start
搞定!

CENTOS6.5开机启动 frps

添加文件 /data/services/frp/frps.sh
nohup /data/services/frp/frps -c /data/services/frp/frps.ini >> /data/services/frp/frps.log 2>&1 &
添加文件 /etc/init.d/frps

#!/bin/bash
#
# Comments to support chkconfig
# chkconfig: - 98 02
# description: your_prog_name service script
#
# Source function library.
. /etc/init.d/functions

### Default variables
prog_name="frps"
prog_path="/data/services/frp/frps.sh"
pidfile="/var/run/${prog_name}.pid"
prog_demon="frps"
options=""

# Check if requirements are met
[ -x "${prog_path}" ] || exit 1

RETVAL=0

start(){
  echo -n $"Starting $prog_name: "
  daemon $prog_path $options
  RETVAL=$?
  PID=$(pidof ${prog_demon})
  [ ! -z "${PID}" ] && echo ${PID} > ${pidfile}
  echo
  [ $RETVAL -eq 0 ] && touch /var/lock/subsys/$prog_name
  return $RETVAL
}

stop(){
  echo -n $"Shutting down $prog_name: "
  killproc -p ${pidfile}
  RETVAL=$?
  echo
  [ $RETVAL -eq 0 ] && rm -f /var/lock/subsys/$prog_name
  return $RETVAL
}

restart() {
  stop
  start
}

case "$1" in
  start)
    start
    ;;
  stop)
    stop
    ;;
  restart)
    restart
    ;;
  status)
    status $prog_demon
    RETVAL=$?
    ;;
  *)
    echo $"Usage: $0 {start|stop|restart|status}"
    RETVAL=1
esac

exit $RETVAL

执行以下命令
# chkconfig frps on 设置开机运行
# service frps start 启动
# service frps status 查看状态
# service frps stop 关闭